Thanksgiving is just around the corner (tomorrow to be exact). And, if you’re anything like me, you’ve already started making menu plans. The only problem is that we are on a very tight budget this holiday season. My usual Thanksgiving favorites like Tofurky, Silk nog, and Tofutti frozen dessert may not make the plate this year, because I’m really trying to save money by making more stuff myself, so to speak.
As you may suspect, there has been some experimenting going on in the VeganYumminess kitchen. And I am pleased to announce that I have fought hard and dirty with tofu and gluten flour and won victoriously! The best part of all is that this roast tastes just like tofurky, and it is SO much cheaper.
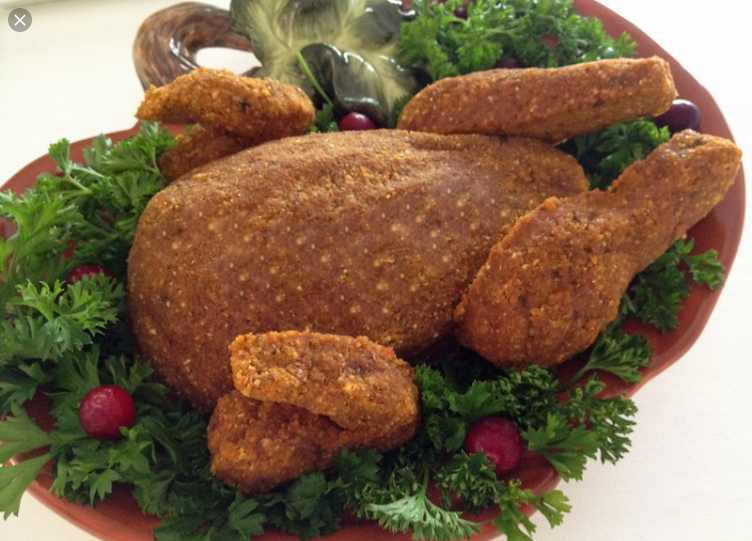
Making a Vegan “Turkey” Roast (a.k.a. Gluten Gobbler)
I am listing the recipe for the roast itself here step-by-step, but there will be a printable version of the roast recipe and my stuffing recipe (although any vegan stuffing recipe will work) at the end of this post.
You will need:
- One 14 oz block of extra firm tofu (I used Nasoya brand)
- 1/3 cup sunflower oil
- 1 3/4 tsp seasoned salt
- 1 1/2 tsp nutritional yeast flakes
- 1/2 tsp sugar
- 3/4 tsp lemon juice
- 2 1/2 tsp Bragg’s liquid aminos (or soy sauce)
- 2 tsp sage
- 1/4 tsp savory
- 1 cup gluten flour (may need more or less depending on the type of tofu that you use)
First, blend the tofu, oil, and seasonings in a powerful blender. I use vitamix, but any strong blender will work.
Next, move tofu mixture to a bowl, and add gluten flour, mixing gradually. Kneed with your hands until very little dough is sticking to the sides of the bowl. Separate dough in to 2 equal sections.
Press each half of dough into the bottom of a shallow bowl, allowing the dough to climb the side of the bowl about 1/2 inch
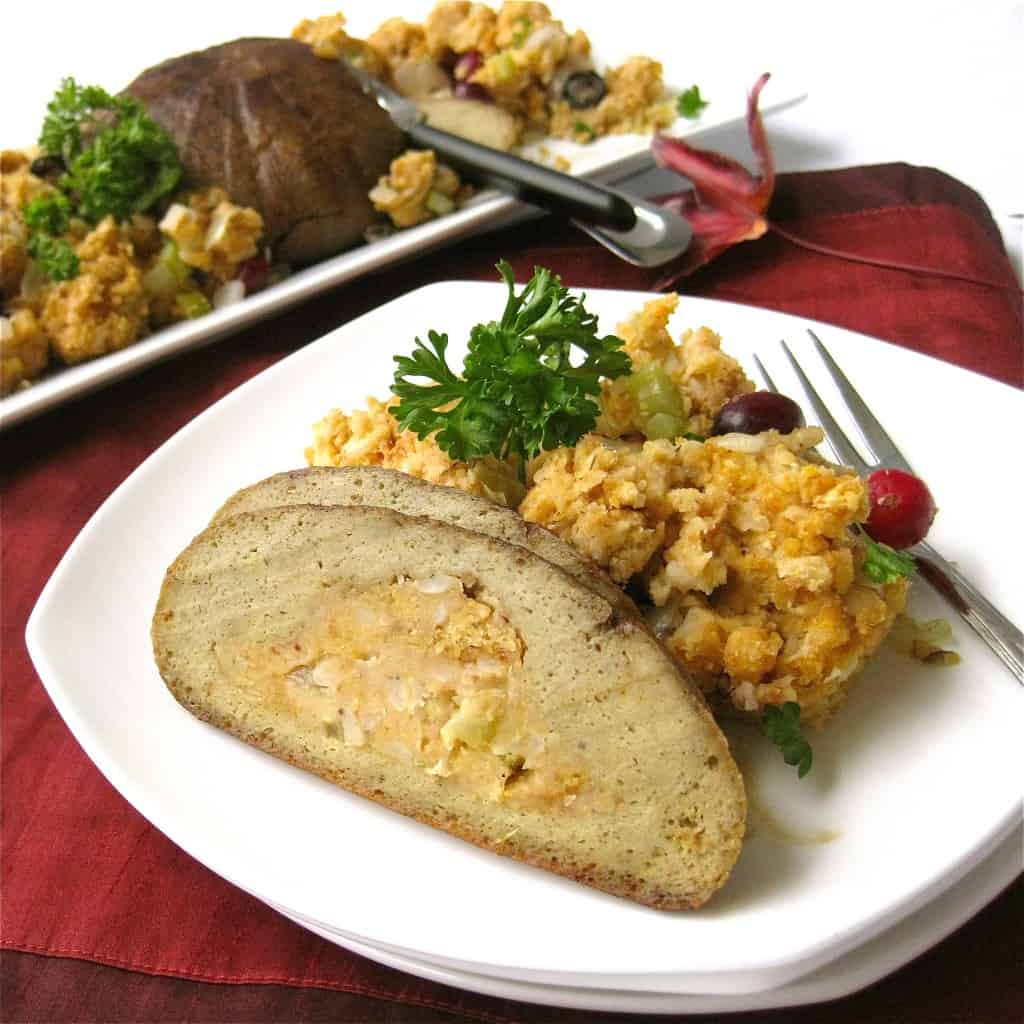
Next, spoon stuffing into the crater of one of the dough halves. Press the stuffing to form a mound.
Place other half of dough on top of stuffing mound, and pinch dough edges together. Wrap the whole roast snugly in cheese cloth, tying at the top.
Then, wrap the whole thing in aluminum foil, and place it in your steamer and cover. Steam for 1 hour, adding water periodically as needed. This idea came from VeganDad, who makes his own vegan lunch meat by steaming his seitan.
After you have steamed your roast, remove the aluminum foil and cheese cloth. Place the roast in a baking dish and pour baste sauce over the top. I used a a few tablespoons of olive oil, a few tablespoons of Bragg’s liquid aminos, 1 teaspoon of orange juice concentrate, and a sprinkle of sage for my baste. The tofurky website has some baste recipes here that look fabulous.
Bake at 350 degrees F for 1 hour and 15 minutes, approximately. Check on you roast after about 45 minutes of baking, to re-baste.
Once you take it out of the oven, you’re ready to serve. Or freeze! You could probably even freeze it after the steaming stage, so that all you have to do is bake it Thanksgiving morning. Enjoy!
Delicious vegan turkey seitan and tofu roast–perfect for Thanksgiving and Christmas.
Prep Time30 mins
Cook Time2 hrs 15 mins
Course: Entree
Cuisine: American
Servings: 10
Calories: 295kcal
Ingredients
For the Stuffing:
- 2 celery stalks finely chopped
- 1 medium onion finely chopped
- 1 tablespoon olive oil
- 14 oz vegan cornbread stuffing of your choice
- 2/3 cups brown rice cooked
- 2 cups warm water
- 1 teaspoon seasoned salt
- 1/2 cup black olives sliced
- 1/4 cup pecans finely chopped
- 1/4 cup fresh cranberries optional
- 1/4 cup mushrooms canned (optional)
For the Roast:
- 14 oz extra firm tofu
- 1/3 cup sunflower oil
- 1 3/4 teaspoon seasoned salt
- 1 1/2 teaspoon nutritional yeast flakes
- 1/4 teaspoon sugar
- 3/4 teaspoons lemon juice
- 2 1/2 teaspoons Bragg’s liquid aminos or soy sauce
- 2 teaspoons sage ground
- 1/4 teaspoon savory
- 1 cup vital wheat gluten
Instructions
For the Stuffing:
- Saute chopped onion and celery in olive oil for 5-10 minutes, or until onion is nearly clear.
- Mix onion, cellery, and remaining stuffing ingredients in a large bowl, then pour into a 9 X 13 inch baking dish. Bake at 350 degrees Fahrenheit for 10 minutes covered, then for an additional 5-10 minutes uncovered.
For the Roast:
- Place all roast ingredients except gluten flour in a blender or food processor. Blend until smooth.
- Place tofu mixture in a bowl. Slowly mix in vital wheat gluten about 1/4 cup at a time (until you reach about 1 cup). Adjust amount of gluten flour as needed. Very little dough should be sticking to the side of your mixing bowl.
- Separate dough into 2 equal halves, then press each half into the bottom of a shallow bowl, until the dough extends about 1/2 inch up the side of the bowl.
- Spoon about 1 1/2 cup prepared stuffing into the center of one half. Press stuffing into dome. Place other dough half on top of dome, and press dough edges together.
- Place several cups of water in steamer and bring to boil. Wrap roast snuggly in cheese cloth, followed by aluminum foil, and place in steamer. Cover and steam for 1 hour.
- Remove roast from steamer, and remove aluminum foil and cheese cloth.
- Place roast in a baking dish, and pour baste over it. Cover baking dish with aluminum foil and bake at 350 degrees F for approximately 1 hour and 15 minutes. Check roast after 45 minutes of baking to re-baste, as needed.
- Serve and enjoy!
A surprisingly easy honey alternative made with apples and lemon. Make this from scratch with fresh apples or take a shortcut with pressed apple juice.
Makes about 1 cup of vegan apple ‘honey’.
Watch the video demo here.
- 8 medium sized apples (Or, shortcut method, use 2 cups of pressed apple juice)
- 1 cup water (not used if using juice shortcut method)
- 1 cup sugar
- 1 tsp lemon juice
- Cut apples into 2″ chunks and remove seeds. I found there was no need to peel the apples; the natural pectin in the peel helps to thicken the syrup
- Blend apple pieces with 1 cup water until pureed. It does not need to be smooth; too smooth will make it harder to separate the juice form the pulp..
- Using a strainer, nut milk bag, or cheesecloth, separate the pulp from the juice. I used a cheesecloth draped over a pitcher and secured with an elastic band. Then, I poured the apple puree into the cloth, a little at a time, using a spoon to press all the juice out. You may have to do it in batches if you do it this way, taking away the dry pulp and adding more wet pulp. You’ll have an easier time with a nut milk bag. You should have about 2 cups worth of juice at the end.
- In a pot, combine the apple juice, lemon juice and sugar. Bring to a rolling boil on high heat, then immediately turn down to medium heat. Don’t let it boil over!
- Let simmer until liquid is reduced to about half or to desired thickness. To test the thickness, chill a spoon in the freezer, then dip it quickly in the syrup. When the syrup on your spoon has cooled, you can touch/taste it for consistency. This may take 20 minutes or more. Keep your eye on this so it doesn’t boil over! Safety first, kids!
- Pour into a heat-safe container and let cool before covering.
- Enjoy!
- Due to a reader comment (thanks Natalie!), I want to point out that depending on the speed of your blender (and therefore, how fine your blender will process the apples), a metal strainer may not work for separating the juice from the pulp. In that case, go for a even finer sieve material such as a few layers of cheesecloth or a nut milk bag.
- Save time by using two cups of pure pressed apple juice or cider. It works just as well; just make sure there are no additives in the cider or juice.
- Save even more time by using a large saucepan. A larger surface area will allow for quicker evaporation. I have made apple honey in only 15 minutes from start to finish with this method.


